
Create an API token and connect your AI assistant
Aktualisiert 5. November 2026
An API token lets your own scripts and AI assistants work with your account. The same token works for the REST API and for MCP, the protocol AI assistants such as Claude use.
Create a token
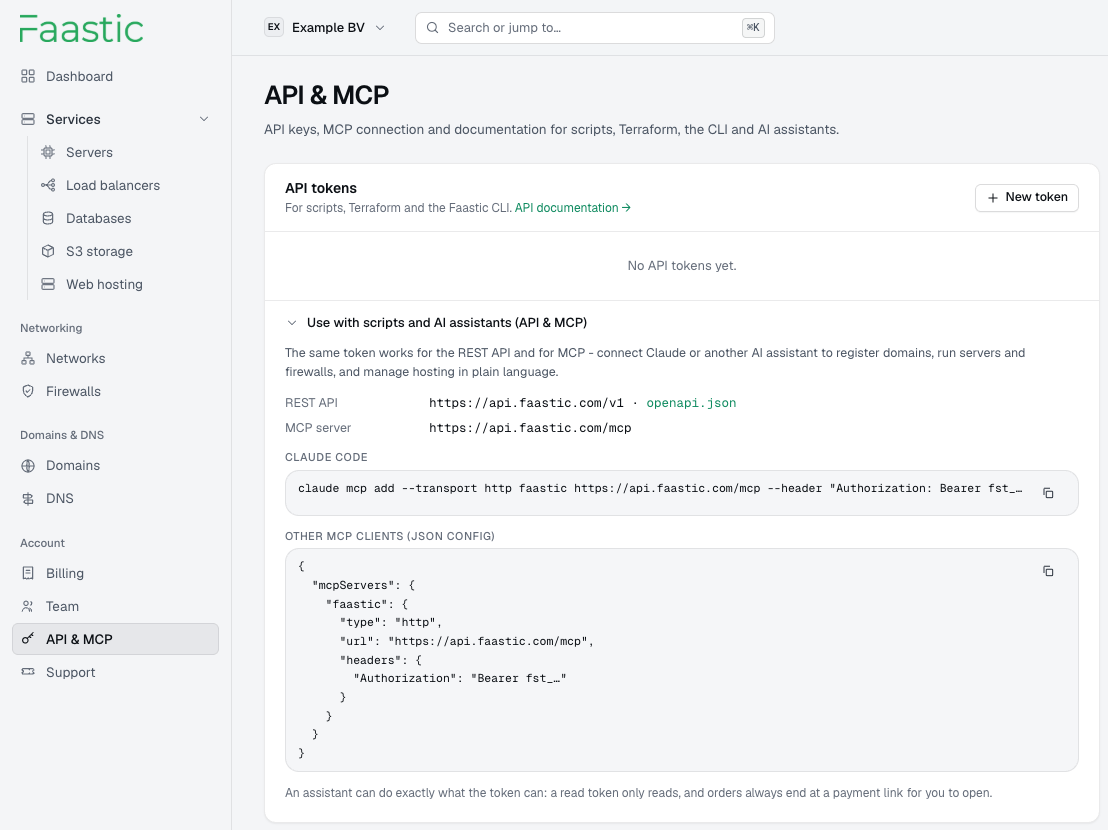
- In the dashboard, open API & MCP in the menu on the left (under Account).
- Click New token and give it a name, for example the script or assistant that will use it.
- Choose the access:
- Read only: can look, but never change anything.
- Read & write: can do anything you can in this organization, including ordering and paying.
- If you like, limit the token to some areas (for example only DNS), to some projects and services, or let it expire after a number of days.
- Click Create token and copy it right away. It's shown only once.
Lost a token? We can't show it again. Create a new one and revoke the old one.
Connect an AI assistant (MCP)
Under Use with scripts and AI assistants (API & MCP) you find the MCP server address, with ready-made setups that already contain your new token:
- Claude Code: copy the
claude mcp addcommand and run it in your terminal. - Other MCP clients: copy the JSON configuration into your client's settings.
The assistant can do exactly what the token allows. A read-only token only reads, and orders always end at a payment link that you open yourself.
Use the REST API
The API lives at https://api.faastic.com/v1. Send the token in the Authorization header of each request. For example, to list your services (your organization ID is shown together with your token when you create it):
curl -H "Authorization: Bearer YOUR_TOKEN" \
  https://api.faastic.com/v1/orgs/YOUR_ORG_ID/services
Every endpoint is described in the API documentation.
Revoke a token
Click Revoke next to the token. Anything using it stops working immediately. Owners and admins see and can revoke the tokens of everyone in the organization.